Entity List
Entity View List
Use the image below to identify the main features of the Tracking Module.
- Main menu access
- View the most recent pending alert
- Vehicle search and indicator of available vehicles after filtering
- Filter entities by groups
- Filter entities within geofences
- Add vehicles to track
- Apply more filters
- Change view of indicators
- Sort by options
- Download the list of entities

Maps
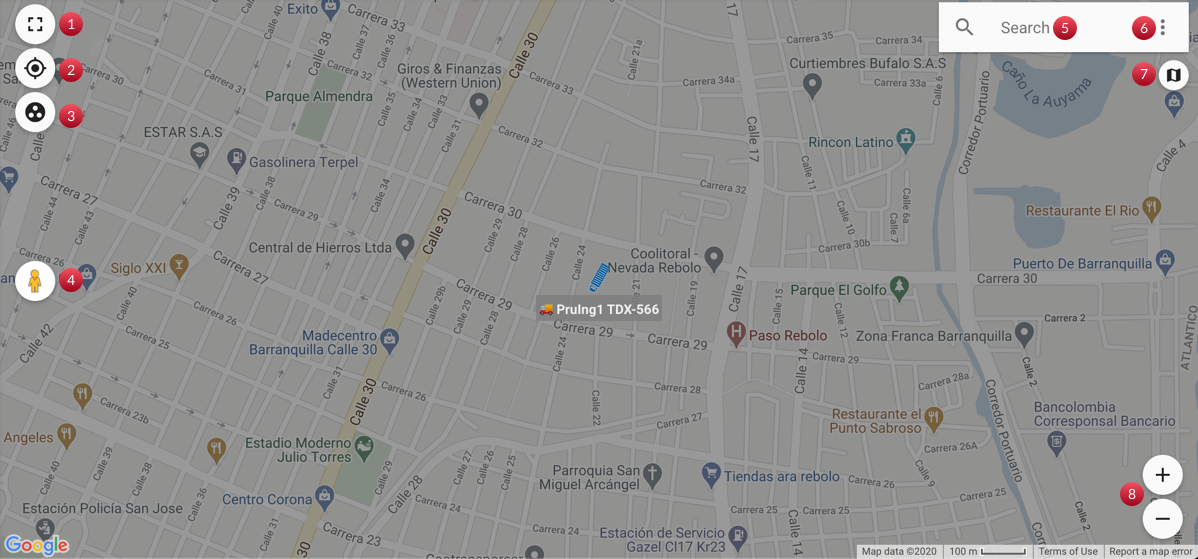
Use the image below to identify the main features in the Tracking Module's map.
- Full-screen view
- Fit all view
- Group/Ungroup nearby entities
- Switch to street view (available only with the Google Maps view)
- Search bar
- Geofences menu
- Map layer switcher
- Zoom in/out
Selecting Entities
When you log in for the first time, the vehicle list may be empty showing a message like the following:
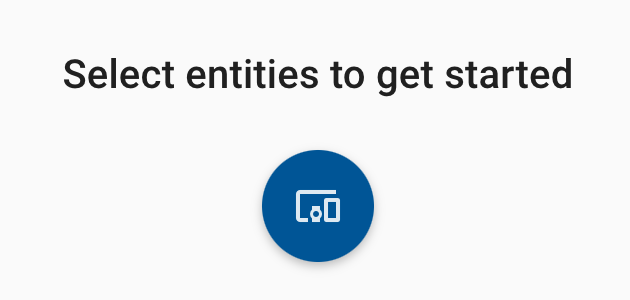
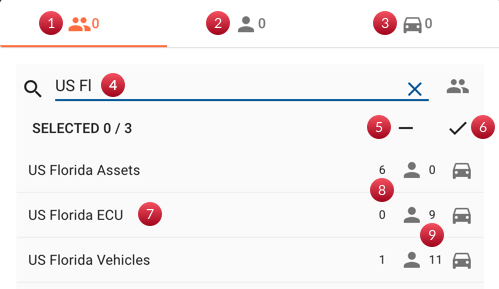
Click the blue button with the screens icon to open the list of groups, assets, and vehicles. Use the image below to identify the main features in this list. After selecting the entities you want to track, click the OK button to confirm the selection.
- Groups: Add all the entities of a selected group to the tracking list
- Assets: Only add selected assets to the tracking list
- Vehicles: Only add selected vehicles to the tracking list
- Filter by Name
- Deselect list
- Select all
- Name of the group, asset, or vehicle
- Number of assets in the group
- Number of vehicles in the group.
Tracking Limits
A maximum limit of 3,000 entities can be tracked at once.
You can click the screens icon at the bottom left of the screen to open the entities selector dialog at any time.
Once you have selected your entities the map will adjust to fit them all based on their last known location. The entities have the following icons to demonstrate their status:
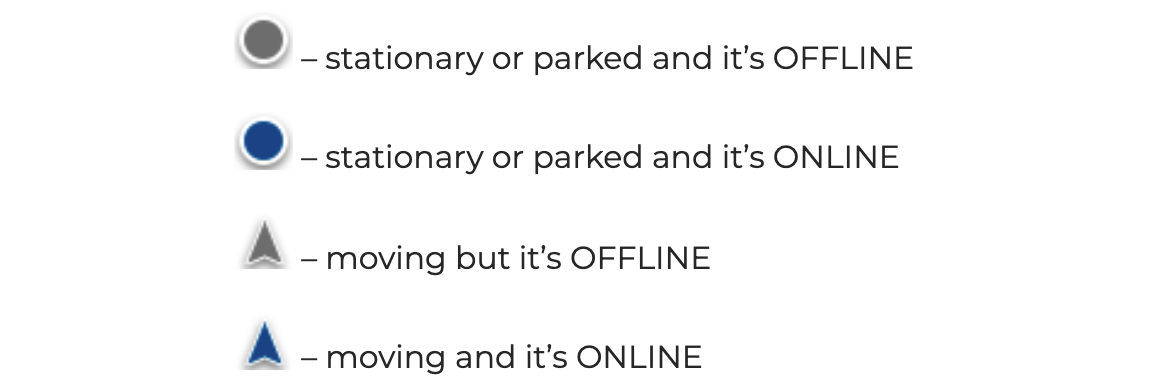
While devices usually remain online, they may occasionally go offline for various reasons. This can be due to poor coverage, network congestion, or the device entering low-energy mode.
Filter Entities
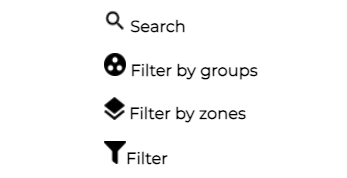
Pegasus provides search, group, and zone filters to help users find and select vehicles efficiently, enhancing fleet management capabilities.
Search: Enter the vehicle name to display matching results.
Group Filter: Select one or more groups to view vehicles belonging to those groups.
Zone Filter: Choose one or more geofences to display vehicles currently within those zones.
Additional Filters: Access more advanced filters to group units based on specific characteristics.
Use the image below to identify the main features of the Entity Filter.
- Number of vehicles displayed in the list
- Reset (remove) the selected filters
- Close the filters section
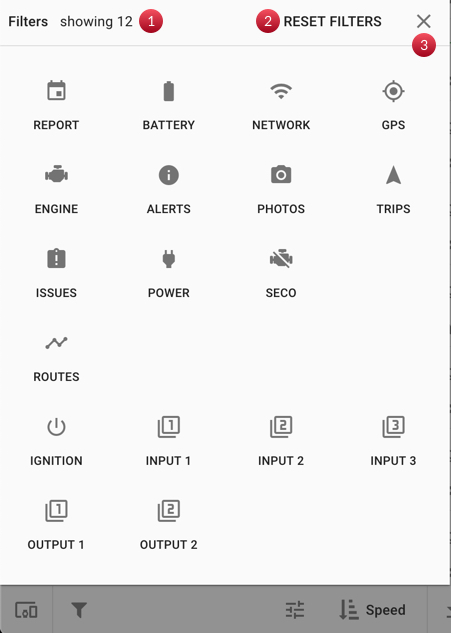
| Filter | Functionality |
|---|---|
| Report | Filter units by their reported position in the last 3 days, 7 days, or the last month. |
| Battery | Filter units by battery states: Good, Low, Critical, or Unknown. |
| Network | Filter units that are Online or Offline. |
| GPS | Filter units based on GPS quality preferences: Good, Low, No Signal, or No Fix. |
| Engine | Filter units by the faults reported by the ECU Monitor: Good, Error, or N/A. |
| Alerts | Filter units by type of alert: Info, Warning, or Critical. |
| Photos | Filter units that have no photo records or that have recently taken photos. |
| Trips | Filter units by their travel status: Moving, Stopped, or N/A. |
| Issues | Filter units that have Issues or that have No Issues. Examples of Issues include low battery, disconnection, no GPS, long time without reporting, etc. Use this for diagnostic purposes to view the units in your fleet that may need maintenance. |
| Power | Filter units by their Power Status: Connected, Disconnected, or N/A. Note: this filter refers to the physical power of the tracking device connected. If it’s disconnected, it may need a physical revision. |
| SECO | Filter units by their Safe Immobilization Activation Status: On or Off. |
| Routes | Filter units by the status of routes being performed by your fleet. This filter complements the Routes view, allowing you to verify vehicle statuses within a route. |
| Ignition | Filter units based on the physical state of a device's inputs/outputs. |
| Inputs | Filter units based on the physical state of a device's inputs/outputs. |
| Outputs | Filter units based on the physical state of a device's inputs/outputs. |
Note
- Selecting "All" on any of the filters removes the selected filter and displays all units.
- The number of units with each status is indicated beside the corresponding option.
- You can combine filters to view entities with multiple conditions simultaneously. For instance, you could see a list of all units with No Power, No GPS, and are Offline concurrently.
Sort Entities
Clicking on the sort icon displays a list of sorting options for the entities. In the image below, you can see the available parameters for sorting: ID, Name, Speed, and Last Report.

View Indicators
Using the Indicator icon (found at the bottom), you can switch between four views to view different information about your entities. In all four views, you will see the name of the entity (top left), if that entity is inside a geofence (underneath), and the entity's last known address (underneath). Below are the four views you can alternate between:
-
Zen/Minimalistic View: Displays the entity's state and its last communication. The aim is to keep the content minimal, where each icon represents a critical warning or an item needing attention. Hover over the icons for additional information.

-
Location Info View: Provides details about the entity's ignition state and current location, including its speed, duration of movement or parking, and GPS quality.

-
Asset View: Displays any associated asset or vehicle linked to the entity. For example, if you've linked your Taurus App to a vehicle, the driver would appear in this view. Assets can also originate from valid iButton identification, RFID tags, Bluetooth Tags, or Fingerprint IDs.

-
IOs & Accessory View: Presents the status of your entity's inputs/outputs and other accessory information. It is compatible with features like Photos, Fuel Sensor, ECU Monitor, Temperature Sensor, and more.

Sorting Options
- You can sort by clicking on the icon, which brings up a selector allowing you to choose between ascending/descending order and enabling automatic updates. Sorting options include time, trip state, online status, name, and speed.
Navigating the Map
The icons on the map aid in entity navigation.
- Fullscreen Icon: Expand the map to full-screen
- Fit All Icon: Adjust the view to fit the filtered list of vehicles.
- Ungroup Icon: ungroup closely located entities.
- Zoom-in and out buttons are located in the bottom right corner for further map control.

Address & Geofence Lookups
The search bar on the upper right-hand side is used to find addresses or geofences. A line separator divides both sections for clarity.
Exploration Mode & Nearby
Clicking on the three-dot icon (next to the search bar) reveals more options, such as the Exploration Mode. This mode helps find addresses on the map and nearby entities. Activate the mode by selecting it in the drop-down menu, then click anywhere on the map. In the dialog, click the three-dot icon, then select "Nearby" to search for entities within 10km of that point.

Change Map Type
To change the map provider to alternatives such as Open Street Maps, Mapbox, or Google Maps (Mapbox & GoogleMaps must be enabled by admins), follow these steps:
-
Open the "More Menu" by clicking the three-dot icon (next to the search bar).
-
Select the settings icon.
-
Select the desired map type.
-
Save your selection by clicking on the checkmark icon.

*Note: Changing the map type also affects other modules like Trips & Geofences.
Updated 24 days ago